
How To Style Halter Tops For Any Occasion
I love halter tops, but I often freeze at the mirror. The neckline looks interesting, yet the outfit feels unfinished.
I used to layer badly or grab the wrong bottoms. That made me avoid pieces I liked.
This guide is what I use when a halter feels off. No fuss.
How To Style Halter Tops For Any Occasion
I show how to balance a halter neckline with the right bottoms, layers, and shoes so outfits feel intentional. These are small, repeatable choices I use when a halter looks half-done. The result is a comfortable, balanced look that reads planned rather than accidental.
What You’ll Need
- Fitted ribbed halter top (black or neutral, stretch)
- Structured knit halter (cream or navy)
- High-waist straight-leg jeans (rigid mid-blue denim)
- Wide-leg tailored trousers (high-waist, neutral)
- A-line midi skirt (silk or cotton, mid-weight)
- Cropped denim jacket (blue, boxy)
- Single-button tailored blazer (neutral, slightly nipped at waist)
- Low-profile strapless bra or adhesive cups (nude)
- Slim leather belt (waist-width)
- Strappy sandals or low block-heel sandals (nude or black)
Step 1: Check fit first — settle how the halter sits
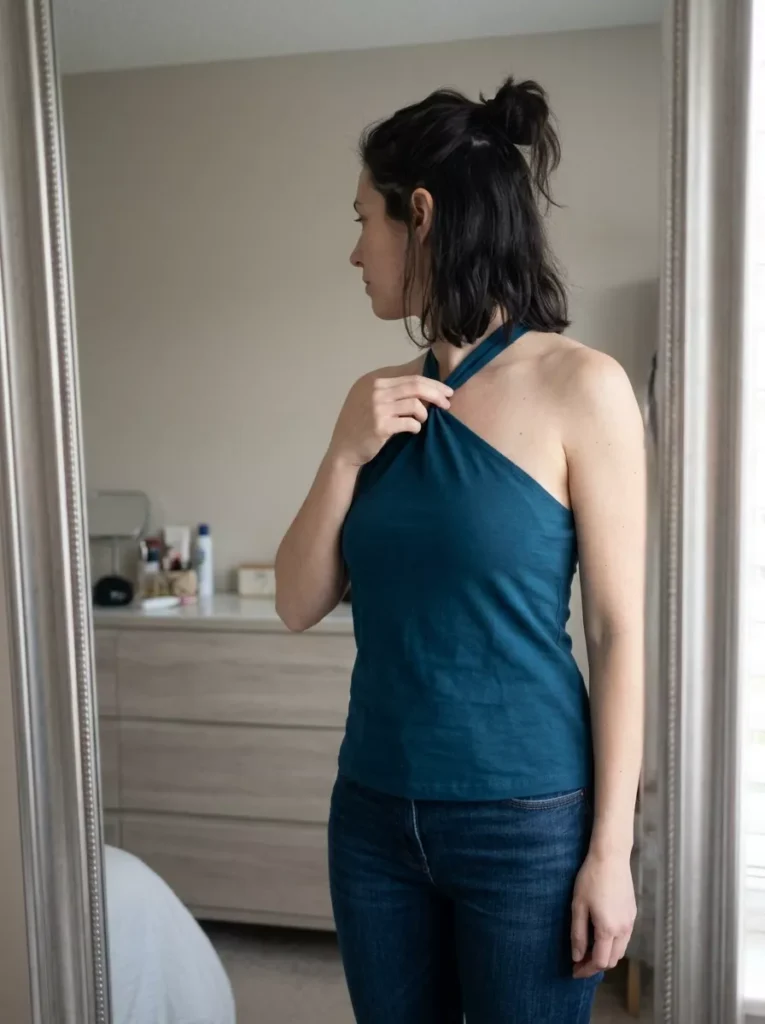
I put the halter on and stand up straight. I note where the straps cross my neck and how the armholes sit. I want smooth fabric under the arms and no pinching at the neckline.
This step changes the whole starting point.
Visually, the top will either look sleek or it will pull and wrinkle. One insight I learned: halters often need a little extra room through the armhole even if the bust fits.
A small mistake to avoid is convincing myself a too-tight halter will stretch later. It usually just shortens the torso and looks strained.
Step 2: Choose bottoms that create the right balance
I decide whether to show a bit of midriff, tuck, or leave the halter untucked. High-waist bottoms lengthen the legs and make the open neckline feel intentional.
Low-rise separates can break the line and make the top read like casual swimwear.
Visually, the outfit either gains a clean vertical line or it feels chopped. One insight I missed at first: tucking a fitted halter into a high waist makes the waist pop without adding bulk.
A small mistake to avoid is pairing a clingy halter with a clingy low-rise pant — that creates horizontal tension and looks crowded.
Step 3: Add a layer that preserves the waist
I reach for a cropped denim jacket or a single-button blazer to shape the shoulders and define my waist. I prefer cropped or nipped styles because they keep the halter’s neckline visible and anchor the outfit.
This step gives the outfit structure.
The shoulders read balanced and the torso looks proportioned.
The insight I keep returning to: cropped layers preserve the halter’s intent better than long, boxy coats. A common mistake is throwing on an oversized long coat first; it swallows the halter and hides the neckline.
Step 4: Solve bra and support cleanly
I test strapless or adhesive options so nothing peeks at the neckline. If the halter is thicker, I use a low-profile strapless bra; for thinner fabrics I trust adhesive cups. I also check that the band sits level and doesn’t ride up.
This step cleans the front line.
The neckline stays uninterrupted, and the bust sits naturally.
One insight I learned: a little shaping inside the top can do more than an obvious bra — it smooths without adding bulk. Avoid the mistake of visible straps or a too-loose strapless band; both read sloppy and distract from the halter’s shape.
Step 5: Final proportions with belt, shoes, and jewelry
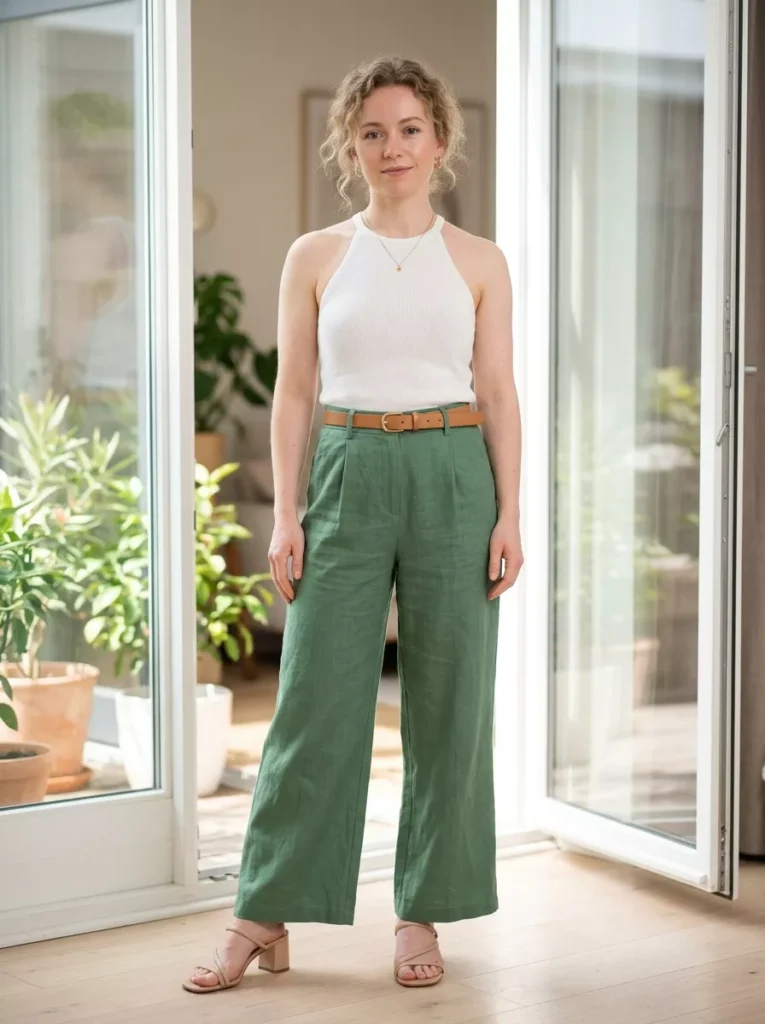
I finish by checking where the eye travels. A slim belt at the natural waist fixes any imbalance with high-waist bottoms. I pick shoes that lengthen the leg—block heels or nude sandals.
I keep jewelry minimal so the neckline stays the focal point.
This stage makes the outfit read complete. Visually, the silhouette looks intentional from top to toe.
One insight I often miss: heavy necklaces fight the halter’s line and create clutter. A small mistake to avoid is oversized belts or chunky shoes that tilt the outfit too heavy on the bottom.
Bra-Friendly Solutions
I keep a small selection of undergarments for halters. I use a reliable strapless bra for thicker halters and adhesive cups for delicate fabrics.
For halters with a built-in shelf, I sometimes skip extras and rely on the top’s construction.
I also alter strap placement when needed.
A racerback converter or a halter-to-racer strap can rescue a top that otherwise shows straps. I prefer solutions that stay invisible under the fabric and don’t reshape the neckline.
Styling For Different Occasions
I treat casual, work, and evening looks differently. For casual, I pair a ribbed halter with straight jeans and the denim jacket. For work, I tuck a structured halter into wide-leg trousers and add the tailored blazer.
For evening, I pick a silk A-line skirt, strappy sandals, and minimal jewelry.
I stick to fabrics and fits that match the event. I look for breathable cotton for day looks and slightly richer materials for night.
Small swaps in shoes and outerwear move the same halter through many settings.
Quick Fixes For Common Fit Problems
I handle gaping armholes by layering a slim tank under the halter or swapping to a size up. If the halter shortens my torso, I switch to high-waist bottoms or un-tuck and add a belt.
When the neckline feels cluttered, I remove necklaces and let the halter breathe.
Simple tricks I use:
- Add a cropped layer to define shoulders.
- Tuck or semi-tuck to adjust waist balance.
- Swap to adhesive cups if straps show.
Final Thoughts
I tell myself to start small. I try one halter look with a trusted pair of jeans and a cropped jacket.
I practice the fit-check and a clean bra solution. That builds quiet confidence.
A halter should feel intentional on me, not like an accident.